
How to Grow Garlic (and companion plant!)
Ask any chef what the most essential ingredient for tasty food is, and garlic may be the most common answer. Garlic is often one of the first things thrown in a pan to cultivate flavor in soups, sauces, and sautes, and is chopped up raw for many dressings as well. Garlic also has a long history as a medicine and health food due to its many nutrients and sulfur compounds, as well as its exceptional antimicrobial and anti-fungal properties. However, garlic is not only a culinary essential and a health-boosting food. It is also a key player in organic pest and fungal control for a healthy, productive, chemical-free vegetable garden. Furthermore, garlic has been shown to enhance soil nutrients and overall production for the plants around it. Let’s explore how garlic supports the health of our gardens and how anyone can start growing garlic themselves in any size space.

Why Garlic is Essential in Productive Garden Design
In the design of vegetable gardens or fruit tree food forests, garlic is one of the essential hero plants that keeps your garden and orchard healthy and productive, and is therefore a fantastic companion to plant alongside many (but not all) vegetables, fruits, and flowers.
Repels & confuses pests
Garlic’s strong aroma deters pests like carrot flies, aphids, mites, voles, moles, rats, mice, rabbits, squirrels, crows, and even deer. This organic pest control works simply by having the plant in your garden beds, but can also be enhanced by using garlic cloves in a homemade pest spray recipe. For those of you with farm animals, cloves can even be added to chicken water to strengthen their immunity and used in chicken sprays to reduce mites and other pests.
Note: Do not give garlic to dogs or any other animals sensitive to alliums.
While garlic deters many pests, it is vulnerable to the pests that any Allium member is prone to. This includes onion thrips, onion maggots, dry bulb mite, stem and leaf nematodes, and Allium leaf miner, etc. Try to scatter alliums around the garden to ensure the benefits of garlic companion planting and reduce the spread of allium-specific pests.
Reduces fungal disease
The reason garlic is used in human health is the strong anti-fungal and anti-bacterial properties it has, as well as its high sulfur content. These properties also reduce fungal and bacterial issues in the soil and boost the immunity of nearby plants. Planting a ring of garlic around a fruit tree is especially effective for fungal issues like peach leaf curl.
Supports beneficial insects
While you generally don’t want your garlic to flower because this would prevent a bulb from fully forming, often a few may flower for whatever reason (water/heat stress, being left in the ground after harvest, etc). Allium flowers, including those of garlic, are loved by pollinators and beneficial insects that prey on garden pests.
Enhances soil nutrients and promotes the growth of surrounding plants
As a companion plant, garlic can influence flowering plants, vegetables, and fruits by offering them immunity against some fungal diseases, improving growth, and even enhancing the output of some crops. Studies show that garlic will release high amounts of soluble protein into the soil as well as possibly increase levels of Nitrogen (N), Phosphorus (P), and Potassium (K). The soil enzymes undergo a change with the growing of garlic, making the soil more suitable for plants to grow well with the added nourishment. Overall, many plants planted as companions for garlic exhibit increased growth.
Enhances the flavor of surrounding vegetables
Garlic planted next to tomatoes and peppers can improve the flavor of the fruits. The same can be said for the flavor of beets grown near their garlic friend.
Takes up minimal space
While garlic is in the ground for a long time, the unique timing of planting and harvesting garlic makes it an attractive choice for a veggie garden designer. Garlic uses garden bed space from Fall until late June/early July, so much of its time in the ground is during months when not much else is growing or when other plants are quite small and therefore easily companion planted amongst garlic. Garlic is then harvested right when other plants need more space and when you need to open up some space for your Fall garden transplants.
Garlic grows tall and vertical, making the space around its base a welcome spot for early low-growing greens with shallow non-competing roots. The greens mulch the garlic to prevent moisture loss and weed competition. A line of garlic can also be planted down the center of a cabbage bed or along trellised tomatoes, serving as a pest repellent and then being harvested before getting overcrowded by expanding cabbage leaves and tomato tentacles.
Easy to grow
Furthermore, garlic is an easy crop to grow for beginner gardeners and has a long shelf life for easy storage for 6-12 months, depending on the type of garlic and storage conditions. This allows even beginners to reap a useful harvest for their household.
All of these properties of garlic in the garden make it a key companion plant to include in your vegetable groupings to minimize pests and maximize food production in any size space.
Types of Garlic
There are three general categories of garlic with different basic attributes, and then within those categories, there are hundreds of varieties with different taste profiles, colors, and clove sizes.
Hardneck Garlic
Hardneck garlic is known for its strong, complex flavor profile, and its defining feature is the production of the culinary prize of garlic scapes for about two weeks in late spring/early summer. A few weeks after scapes are removed, large, easily peeled garlic bulbs can be harvested and stored for about 6 months under proper conditions. The “hard” neck refers to the stalk stemming from the center of the bulb that turns rigid when mature. Bulbs have a thick yet brittle skin that tolerates harsh cold winters but breaks down quicker once harvested, reducing the storage time after harvest when compared to softneck varieties.
Within the hardneck category, there are over 200 varieties; however, three general types include:
Purple Stripe
Mild flavor
Purple and white color
8-12 cloves per bulb
Rocambole
Spicy flavor with low sulfur aftertaste, even eaten raw
Tan color
12 cloves per bulb
Easy to peel, which reduces storage life to 3-6 months
Porcelain
Musky flavor
White color
4 cloves per bulb
Purple stripe and Rocambole types are the hardiest varieties for colder climates, while porcelain grows better in milder climates. Note that all hardneck varieties require at least 40 days of temperatures less than 40 degrees to produce bulbs (a process called vernalization).
Softneck Garlic
Unlike hardneck garlic, softneck garlic does not produce those delicious scapes. This makes its neck more flexible and allows soft neck garlic to be braided for hanging storage that doubles as beautiful decor when combined with some dried flowers. Softneck garlic makes up for its lack of tasty scapes with a slightly quicker maturity time and longer storage life of 9-12 months. If you grow both hardneck and softneck garlic, plant each in separate areas to know the difference, and once harvested, use up the hardneck garlic first before moving on to the softneck, since the softneck will be fine for a bit longer in storage. Softneck garlic does best with milder winters and hot summers, and does not require a cold period to produce bulbs.
There are two main types of softneck garlic:
Silverskin Types
Longest storing of any kind of garlic
Spicy flavor
12-24 cloves per head
Artichoke Types
Most common garlic in grocery stores
High yield
Mild flavor
8-20 cloves per head
Elephant Garlic
Elephant garlic is actually in the leek rather than the garlic category, although it earns the garlic name because of its subtle garlic flavor. It does not produce scapes, has a milder flavor, very large and easy-to-peel cloves, and a long storage life of 10 months. This unique plant is a biennial, meaning it completes its life cycle in two seasons. The first year, a large bulb will form, and in the second, the large bulb will divide into separate cloves and send up flower stalks. However, sometimes fall-planted elephant garlic will develop separate cloves by the normal garlic harvest season, 8-9 months later. If, when you harvest, there has not been division, you can leave the large bulb in the ground for another year, or you can harvest it as one large bulb.
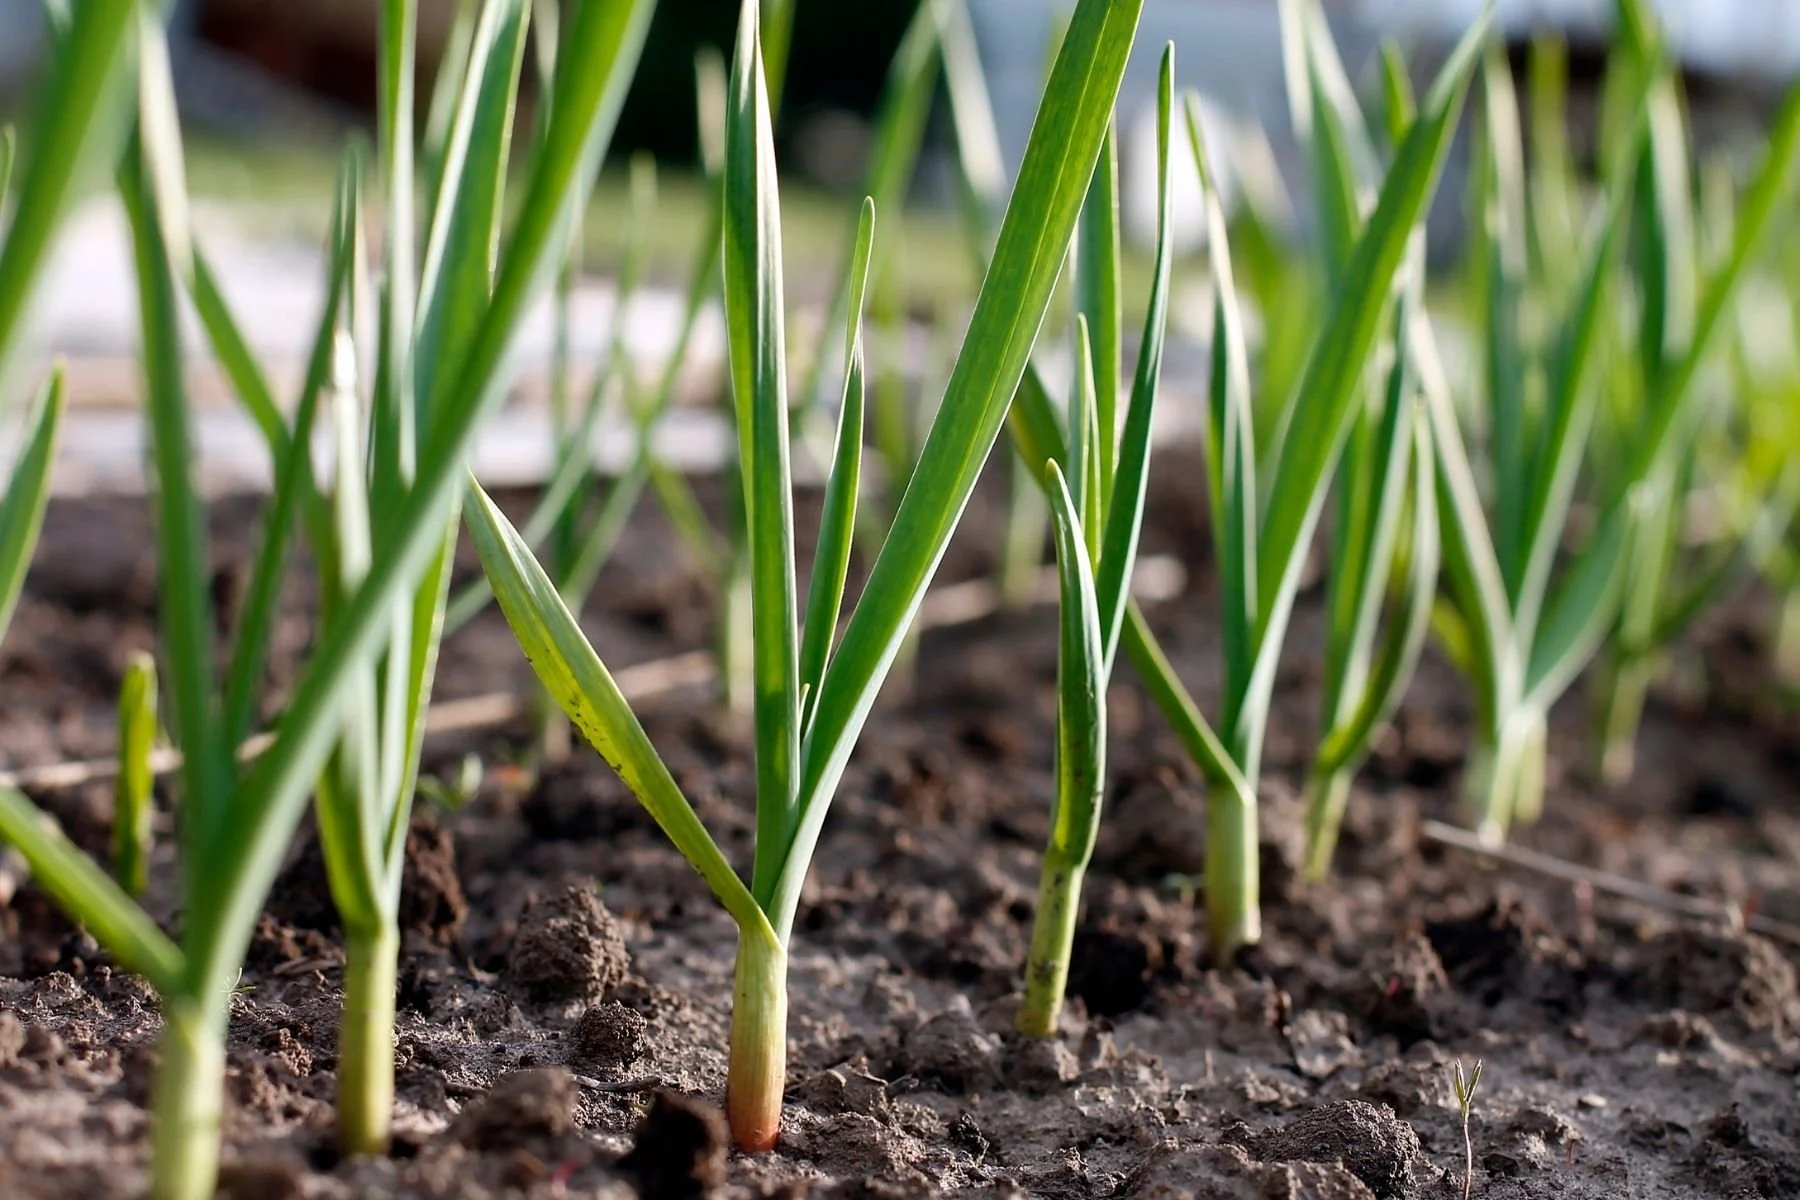
How to Plant Garlic

Fall Planted
Garlic is planted in the fall months of late September to mid-November. This allows the cloves to develop roots before winter and then really take off in spring. It’s important to mulch your garlic beds heavily to protect them from winter cold. A thick layer of Fall leaves makes a great warm blanket for your garlic. Just remember to pull them back a bit in spring to ensure garlic can pop through.
Use “Seed” Garlic
You can try planting garlic cloves from the store, but often these varieties are bred or treated to resist sprouting, which may reduce your success. Usually, you get started with some seed garlic from a certified grower, local farmer, or gardener friend. Then, each year you can plant cloves from last year’s harvest. When deciding how much garlic to plant each year, consider your family's use for eating and add enough to have left over for planting the following year. Always choose your best and largest cloves for planting to continue to improve your seed stock. In this way, you don't have to purchase expensive seed garlic each year.
If you are just starting out and want to add variety once in a while, or notice any disease in your own garlic, you can seek out garlic seed from online companies, local farm stores/nurseries, or local farmers. Certified seed garlic usually ensures a disease-free start and good genetic selection.
One way to generate many more garlic cloves for planting without spending a bunch on seed garlic is to propagate clones of the parent plant from the bulbets that are produced when hardneck garlic starts to go to seed (so instead of harvesting the scapes (as described below), you leave them to develop into a flower in late summer). Each scape can produce 10 to 100 of these mini aerial bulbs – and you can sow all of these out to form a bulb in year 2-3, depending on how big you want to let them get before harvest. Not only are these bulbets free of any soilborne diseases that may be present in the ground-grown seed garlic, but you can also increase your planting stock much faster than if you’re saving soil-grown cloves to plant out. So if you are willing to sacrifice a few of your tasty scapes, give this a try to quickly grow your garlic stock!
Choose and Prepare Beds
Garlic beds should get lots of sun and be amended with ample compost. Some recommend adding bone meal, rock phosphate, bat guano, or other phosphorus-rich amendments that support root growth before winter, but this also depends on your unique soil profile. If your pH is low (acidic), you can add lime, as garlic grows best at a pH of 6.0-7.0.
The most important thing in choosing a location is considering how you want garlic incorporated into your garden design plan for the following year. As noted above, garlic is an excellent plant companion for repelling pests, so it can be planted near things that need some extra pest protection. To maximize space, garlic can be planted amongst low-growing plants like baby greens and cabbage. Do not plant alliums like garlic next to peas and beans, as the anti-microbial activity interferes with the nitrogen-fixing bacteria on the roots of these plants.
Consider that garlic is harvested mid-summer at the exact time that hot crops like tomatoes are starting to need more space and fall crops are starting to be transplanted. Therefore, garlic clove placement in the Fall can take up the space where you want fall crops the following year, or can be planted next to plants that will start needing the garlic’s space for their bushy growth by mid-summer.
Pre-soak Cloves (optional!)
This step is not required or that common, but some farmers swear it gives their garlic bulbs a boost by jumpstarting the growth of your garlic’s roots in the fall, especially if you are getting them in the ground a little later in the planting window. Sterilizing can help reduce the chance of disease, although it is usually not necessary.
These instructions are based on those provided by Keene Organics:
To sterilize: Soak the cloves in a full-strength sterilizer for around 10 minutes.
Sterilizer Options:
Isopropyl Alcohol 70%+ (do not dilute)
Hydrogen Peroxide 3%+ (do not dilute)
Sanidate (follow the produce soak instructions on the bottle for a safe dilution ratio)
Strain cloves and then put them into a container with a fertilizer like fish emulsion, kelp meal, or specified garlic fertilizer. Add one teaspoon of baking soda per gallon of water. The cloves should soak for at least 30 minutes. The maximum time to leave the cloves in the fertilization soak is 3 days. After 3 days, they may develop roots at the bottom, which are very delicate, so take care not to damage them while planting.
Plant cloves as described below.
Plant with Appropriate Spacing
Separate the cloves just prior to planting, but don’t peel them as the skins will help prevent rot. Plant cloves 1- 2 inches deep, root side down, pointed tip up. Space plants 4 - 8” apart (spacing depends on who you ask and what your plans are for companion planting). If planting in rows, the usual recommendation is about 12 inches between rows. However, if bulbs are planted offset from each other, rows can be a little closer or use up that space between rows for intercropping.
Mulch for Winter Protection and Fertilize for Spring Boost
Once cloves are covered with soil and compost, be sure to mulch them to protect them from winter temperatures. If you have access to fall leaves, spread a thick layer of those over your garlic. Straw or grass clippings also work.
In the spring, your garlic will really start to take off. Be sure to check under the mulch and pull it back a bit if it is impeding the growth. During this burst of growth, your garlic needs nitrogen, so mulch with more compost, sidedress with nitrogen-rich amendments like bloodmeal or cottonseed meal, or apply a diluted liquid fish fertilizer to feed your garlic plants. Additional liquid fertilizer and side dressing with compost every two weeks from March until the start of summer can boost the size of your bulbs. Stop fertilizing once bulbing begins in summer. Composting and mulching around garlic throughout the season also helps reduce weeds since garlic does not like competition and will produce smaller bulbs if surrounded by weeds.
Harvesting, Curing, and Storing Garlic

Garlic is harvested in mid-summer (late June - late July, depending on type) once the bottom third of leaves have slightly browned and about four green leaves remain. However, for hardneck garlic, there is an extra step that is essential to do a few weeks before harvest in order for good bulb formation. Once the scape grows in a full curve (about 9 inches) and before the flower shows any signs of opening, cut it off close to the top leaves, which will tell the plant to put its energy into developing a larger bulb rather than a flower. Sauté garlic scapes to give your dishes some delicious garlic flavor, blend scapes into a delicious pesto, or use their beautiful shape in spring flower arrangements. Once the scapes are removed, it will be about 2 weeks until harvest of the garlic bulb. During this time, watering can be stopped to let bulbs dry a bit.
If garlic bulbs are left in the ground too long, the outer wrapping will have browned so much that it reduces the storage time. Late-harvested garlic is fine to eat, but eat it within a few months since it won’t store as well.
In order to give garlic its longest shelf life, it needs to be cured, which means hanging plants with leaves, stems, and dirt attached in a well-ventilated area out of direct sunlight for 6-8 weeks. Then trim the roots and stem and move to storage without washing.
For optimal storage, choose a place that maintains a temperature of 45-55°F at 50% relative humidity. Hang garlic in netted sacks, place on slatted or wire screened shelves, or make and hang braids of the softneck types so there is air circulation on all sides.
Small Space Option: Grow Garlic (or Garlic Greens) In a Pot
To grow garlic in a small space, choose containers eight inches or deeper for your cloves. Two- or three-gallon pots are sufficient. Larger pots, like five- and ten-gallon sizes, can hold more cloves. Overwintering in pots can be a challenge in areas with cold temperatures; protect the pots with frost cloth, old bedsheets, or blankets, and add mulch on top of the dirt. Another option is to grow garlic just for the garlicky green tops, in which case you can grow these inside on a sunny windowsill, as only the bulbing part requires colder temperatures. This method also means more cloves can be planted per pot since there won’t be bulbs taking up space. Then trim the greens to add garlicky flavor to your dishes.
FAQ
-
Local nurseries, farm stores, farmstands, or online at companies such as Keene Organics, GrowOrganic, Territorial Seed, or Baker Creek Seed.
-
Well-drained, light, loamy soil rich in organic matter and pH of 6.0-7.0.
-
Garlic can be stored whole for 6-12 months (depending on the type of garlic, harvest timing, and storage conditions) if cured for a few weeks (hung in a well-ventilated space out of direct sunlight) and then kept in a cool, dark place (45- 55°F at 50% relative humidity).
Other ways to preserve garlic include:
Dehydrating into garlic powder or garlic salt
Pickling
Fermenting
Making garlic-infused oils for flavorful cooking
Using it in recipes like pesto, pasta sauce, or soups, and then freezing
-
Some plants that specifically benefit from garlic include….
Carrots
Kale
Broccoli (and all brassicas)
Beets
Spinach and other greens
Kale
Lettuce
Eggplant
Peppers
Tomatoes
Roses
Marigold
Geraniums
Dill
Cabbage
Chamomile
Strawberries
Celery
Cucumber
Potatoes
Fruit trees
Plants to avoid near garlic…
Asparagus
Sage
Parsley
Peas
Beans
And other legumes and nitrogen-fixing plants
-
Beyond simply planting garlic near plants that tend to be vulnerable to pests, the garlic aroma and beneficial properties can be cultivated in a garlic extract, homemade pest spray, or natural fungicide.
Garlic extract is made by pouring 1 liter of boiling water over one large garlic clove and letting the mixture stand for 24 hours before pouring it over a bed that needs extra pest deterrence.
Organic Pest Sprays can be made with a variety of recipes. For example:
Take four hot green peppers, 3 or 4 garlic cloves, 3/4 tsp liquid soap, 1 tsp vegetable oil, and 3 cups of water. Puree the garlic cloves and pepper in a blender and pour it into a glass bottle, and add water, oil, and liquid soap into it. Let it stand 24 hours. Strain out the pulp and spray this solution onto the infested plants, making sure to drench the plants thoroughly.
Natural Homemade Fungicide also has various recipes. For example: Mix 2 garlic bulbs and 1 tsp of liquid dishwashing soap in 2 cups of water and grind the mixture. Run the mix through an unbleached cheesecloth. You can store this paste in a refrigerator for months, and when you want to use it, just add 1 gallon of water to it and spray it on your plants that are infected with fungal diseases.
Note: Always test homemade products on a leaf before applying to large areas of the plant to ensure no damage occurs.
Final Thoughts
Garlic is good for the taste buds, the body, and the garden, takes minimal space and resources to grow, and stores for up to a year. In other words, it is an ideal crop to include in any garden. Therefore, each fall, remember to tuck some garlic cloves into your garden beds to enjoy all the flavor and benefits next season.